Taking on a big sewing project can be a little daunting. But having the right tools for the job will make it so much easier! For this blog, we’re going to give you the inside scoop on Annie’s Top 10 Favorite Tools. Keep reading to see why she loves these tools and pick up some great tips to make them work for you!
1. ByAnnie’s Stiletto & Pressing Tool
It took the ByAnnie team nearly two years to develop this tool, and it’s a tool that we all  agree we wouldn’t sew without!
There were a lot of prototypes made, and several adjustments to make it just right. Once finished, it soon became one of Annie’s very favorite tools.
She says, “I keep a ByAnnie’s Stiletto & Pressing Tool at each of my machines plus one on my worktable and another in my travel sewing kit so that I always have one close at hand.”
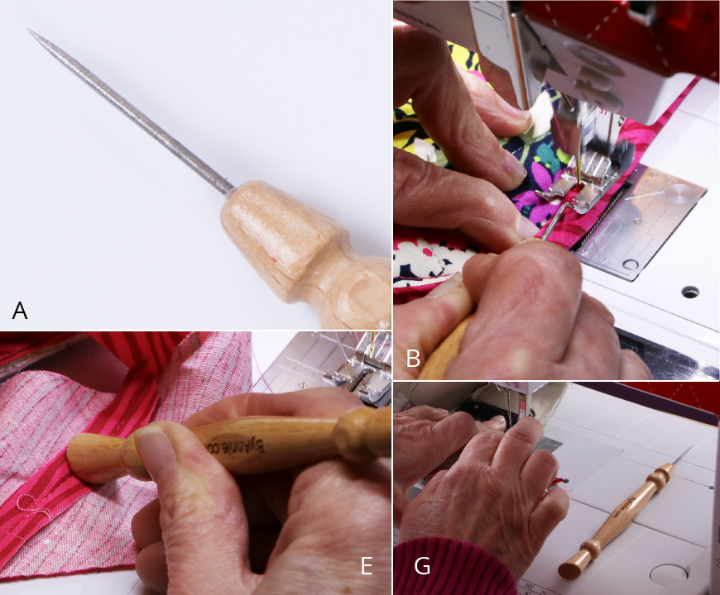
When asked why she loves this tool so much, she responded with several points:
A. First and foremost, I love the sand-ground point on the stiletto. Made from high-carbon German-made steel, the point is the perfect length for precision placement. The tip is lovingly “roughed up” which prevents the point from sliding off the fabric and really helps you grab, pull, and hold pieces in place. You will not believe the difference that the little bit of roughness makes!
B. I can keep the tip of the stiletto in place on the fabric almost until the needle reaches the point. It is impossible to keep my fingers in place when I get that close to the needle!
C. The tool is very lightweight, so my hands don’t get tired. Turnings on the handle make it easy to hold and grip.
D. I use the stiletto to mimic the action of a walking foot when I’m sewing fabric to Soft and Stable. It really helps prevent layers from moving and shifting.
E. We worked hard to get just the right angle on the pressing end which I use to press seams open. Now I don’t need to stop what I’m doing and go over to the ironing board. I can just keep working at my machine!
F. The pressing end is also really helpful when binding mesh pockets as I can press the mesh toward the binding quickly and easily.
G. Last but not least, we flattened two sides of the tool so that when I drop it on my workspace, it doesn’t roll. No more crawling around on the floor looking for a tool that rolled away!
 TIP: The point of the stiletto is very sharp. Be sure to cover it and keep it away from children, pets, and rowdy teenagers. Annie uses 3” to 4” lengths of plastic tubing with a ⅜” inside diameter to cover the ends of her stiletto, seam ripper, snippers, and more. This protects the ends as well as the user when the tools are stored.
For more information and to see some of the ways Annie uses the ByAnnie’s Stiletto & Pressing Tool in her projects, click here to watch these fun videos.
2. ByAnnie's Double-Sided Basting Tape
Annie loves this extra-sticky double-sided basting tape. She uses it to hold ribbon in place, and also hook & loop when she is using it on her projects. It is excellent for sewing and crafting!
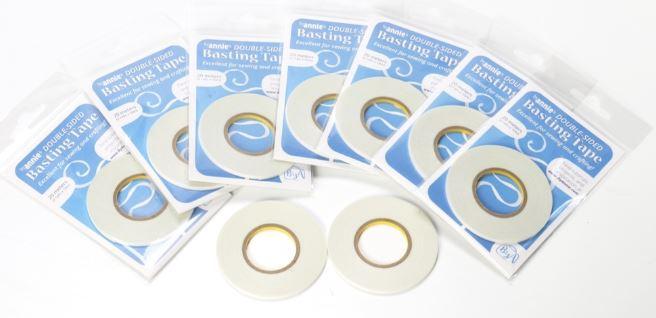
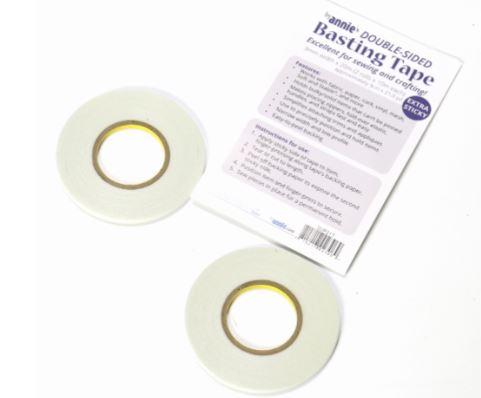
It can be used with fabric, paper, cork, vinyl, mesh, Soft and Stable, and more. Try using it on your other crafts.
It also works well with zippers, fold-over, handles and straps. Whenever you would like to hold items in place while sewing, give the double-sided basting tape a try.
3. Wonder Clips
 Annie says, “I really cannot imagine making bags or any project using Soft and Stable without Wonder Clips. Not only will Wonder Clips hold multiple layers of fabric with ease, but they prevent all those pokes from pins!”
Wonder Clips hold pieces tightly in place and don’t distort fabrics like pins often do. Since they don’t make holes, they are perfect for fabrics that don’t “heal” such as vinyl or leather.
Annie mentions, “More than just handy clips, they also have ¼" and ½" seam allowance  markings on the base of the clip to help you line things up.”
Wonder Clips can be used for a lot of other crafts too. Try using them for knitting, crocheting, beading and so much more.
TIP: Remember that Wonder Clips have a top side (colored) and a bottom side (the flat, clear side). Be sure to attach them to your project so the flat side is on the bottom. This prevents the clips from catching on the machine and makes it much easier to sew.
___________________________________________________________________________________________
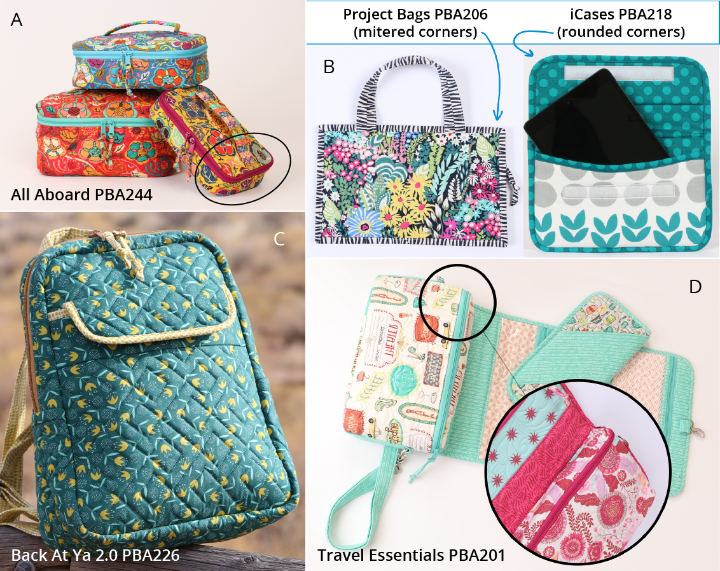
Many of Annie’s projects have rounded edges. There are several reasons for this:
A. A rounded corner makes it easier to join pieces such as when joining the front or back of the bag to the zipper/side strip.
B. It’s easier to bind a curved edge than to miter binding on square corners.
C. Curves have a nice flow and give a more finished appearance on bag flaps.
D. It’s easier to sew a zipper to a curved edge than to a piece with square corners.
To guarantee that everything fits together perfectly, Annie’s patterns instruct the maker to round corners using a circular object of a particular size. Depending on the project, the circle used may be 2½”, 3½”, 4½”, or more.
The Circle Rulers by Creative Grids include six circular rulers in sizes from 2½” to 6½”, making it simple to round the corners to the perfect size.
Just position the ruler in place as directed in the pattern and cut along the edge with a rotary cutter.
As with all Creative Grids rulers, the circle rulers have an exclusive “gripper” texture to hold the ruler in place while cutting. This eliminates slipping and ensures an accurate cut.
TIP: When making a bag such as the Ultimate Travel Bag 2.0, it’s really important that the  math of the zipper/side strip matches the math of the front or bag so that everything fits together perfectly when the bag is assembled.
For this bag, we round the bottom of the bag with a 2½” circle and the top of the bag with a 5½” circle. If you just go to the cabinet and grab a couple of glasses to round the corners, but one is 3” and the other is 6”, you’ll end up cutting away an extra inch of fabric and things are NOT going to fit.
Using the Creative Grids rulers ensures that you’re cutting exactly the right size so everything will go together perfectly.
___________________________________________________________________________________________
5. Quick Turn Fabric Tube Turning Tool
 We love to make straps and handles for our projects from coordinating fabric, but we want them to be strong and sturdy for long-lasting wear. To accomplish this, Annie’s patterns include instructions for making fabric tubes which are reinforced with strapping.
The Quick Turn tool makes quick work of turning those fabric tubes right side out. It comes with plastic cylinders in three sizes, so you always have the right-sized tool for the fabric tube you’re turning.
Annie says, “I'm always looking for a quicker, easier way to do things, so I was really excited when I discovered this handy tool. It is SO easy and quick to use.”
TIP: To see how Annie uses this handy tool, click here to watch her video.
___________________________________________________________________________________________
6. Bodkin, Clip 'n Glide
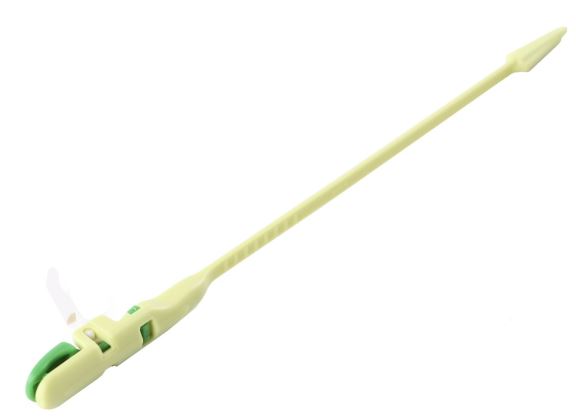
This worked, but occasionally the pin came open part-way through and it was sometimes difficult to “feel” the end of the pin inside the tube.
Annie tried using a variety of bodkins but had problems with them being difficult to grip through the fabric tube or with the bodkin coming loose from the strapping.
So, Annie was thrilled when a student at a class in Australia showed her this handy bodkin. With grippy teeth on the end and a sliding closure, it holds the strapping securely and makes it a breeze to pull strapping into the tube. Why struggle when there’s a better way?
___________________________________________________________________________________________
7. Clover Chaco Liners
 Many of the ByAnnie patterns require you to draw lines on the project pieces to aid in aligning handles, borders, pockets, etc.
Annie shares, “I love using Clover Chaco Markers for marking these lines. They're easy to use and make a fine, easy-to-see line. Best of all, the marked lines are very temporary as the air created by the movement of the needle in and out of the fabric removes the mark as I sew.”
TIP: Our first choice is always the white marker as the lines are especially easy to remove. If we’re using really light fabrics and the white just won’t show up, we prefer the marking VERY lightly using the blue or silver (or using a different marker).
Always remember to test the markers on a small swatch of fabric before you start marking your project. By doing this first, and reading all the instructions on the package, you’ll have great results.
___________________________________________________________________________________________
8. Snip-Eze Multi-Use Comfort Snippers
 We LOVE using these snips for clipping threads as we are sewing, but they’re great for hand or machine embroidery, too. They enable you to get really close to the fabric and are extra-sharp for a quick and easy cut. Just squeeze to cut.
TIP: The curved tips prevent cutting the fabric and also allow the snips to fit right up next to the fabric, so you’ll get every little bit of thread clipped away. They’ll even fit easily under the presser foot.
___________________________________________________________________________________________
9. Bias Tape Maker
Annie shares, “Since I don’t press bindings, I’ve never used a bias tape maker to make  bias bindings. However, I love using a bias tape maker to make zipper pulls for my purses and bags. Because they’re such narrow strips of fabric, trying to create the zipper pulls on your own would be very difficult.”
TIP: To make a zipper pull, just make a ½” bias strip; press it in half and stitch down the middle lengthwise. Click HERE to watch Annie show you how in this great video.
___________________________________________________________________________________________
10. Seam-Fix Seam Ripper and Thread Remover
Sure, there are hundreds of seam rippers out there to choose from, but we love the neat “rubbery” plastic tip on the end.
Annie asks, “Why take the time to pluck out all those little bits of thread by hand?”
She continues by saying, “Just erase the bits of thread right off your project. This tool works really well and doesn’t stick to your fabric or leave behind any markings.”
___________________________________________________________________________________________
What are your favorite tools? What can't you live without when making your projects? We’d love to hear your opinions and input in the comments below!
ANNIE'S FAVORITE TOOLS