You've thoughtfully picked out your fabrics, zippers and accessories. You've spent hours at your sewing table, creating your own personal masterpiece. You're proud of what you've accomplished and now you're ready to show it to the world! Follow along as we go over some tips on how to take a great photo of your amazing project. Not only will we help you to highlight your skills and talent, but we'll help you show off just how creative you are!
___________________________________________________________________________________________
Let It Shine
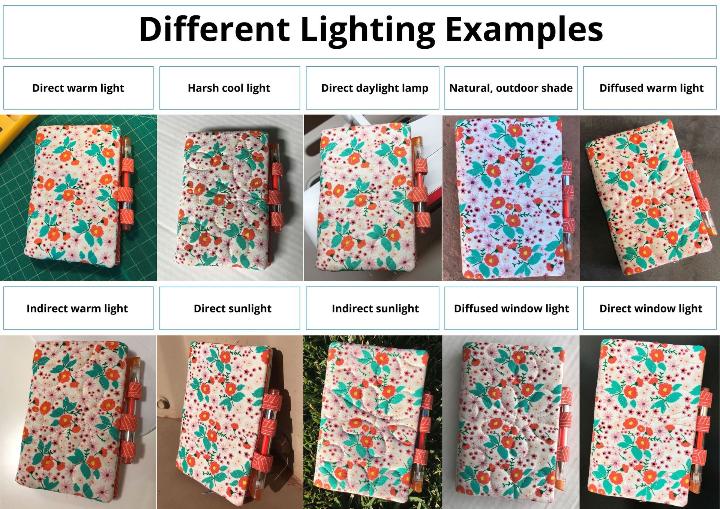
Lighting is important because the different color temperatures in a bulb can skew the colors of the fabric you carefully chose. The best lighting for displaying your project in is cool, natural lighting (about 4000K-6500K). One easy way to achieve natural lighting is either through a large north window or just by taking your project outside.
If you have a bright lamp in your sewing studio that can work too, but keep in mind that lamps can sometimes put uneven lighting over your project. The fabric closest to the bulb would look brightest and the rest of your project would be in the dark, so beware of that. Play around with placement of the lamp and your project to see what looks best. Have fun taking pictures of your project in different kinds of light to find out what works best for you.
Tip: good lighting prevents the need to edit your image.

___________________________________________________________________________________________
Pixel Perfect
You don’t need a lot of fancy or expensive equipment to take good pictures. Most phone cameras these days are able to take good-sized, quality photos.
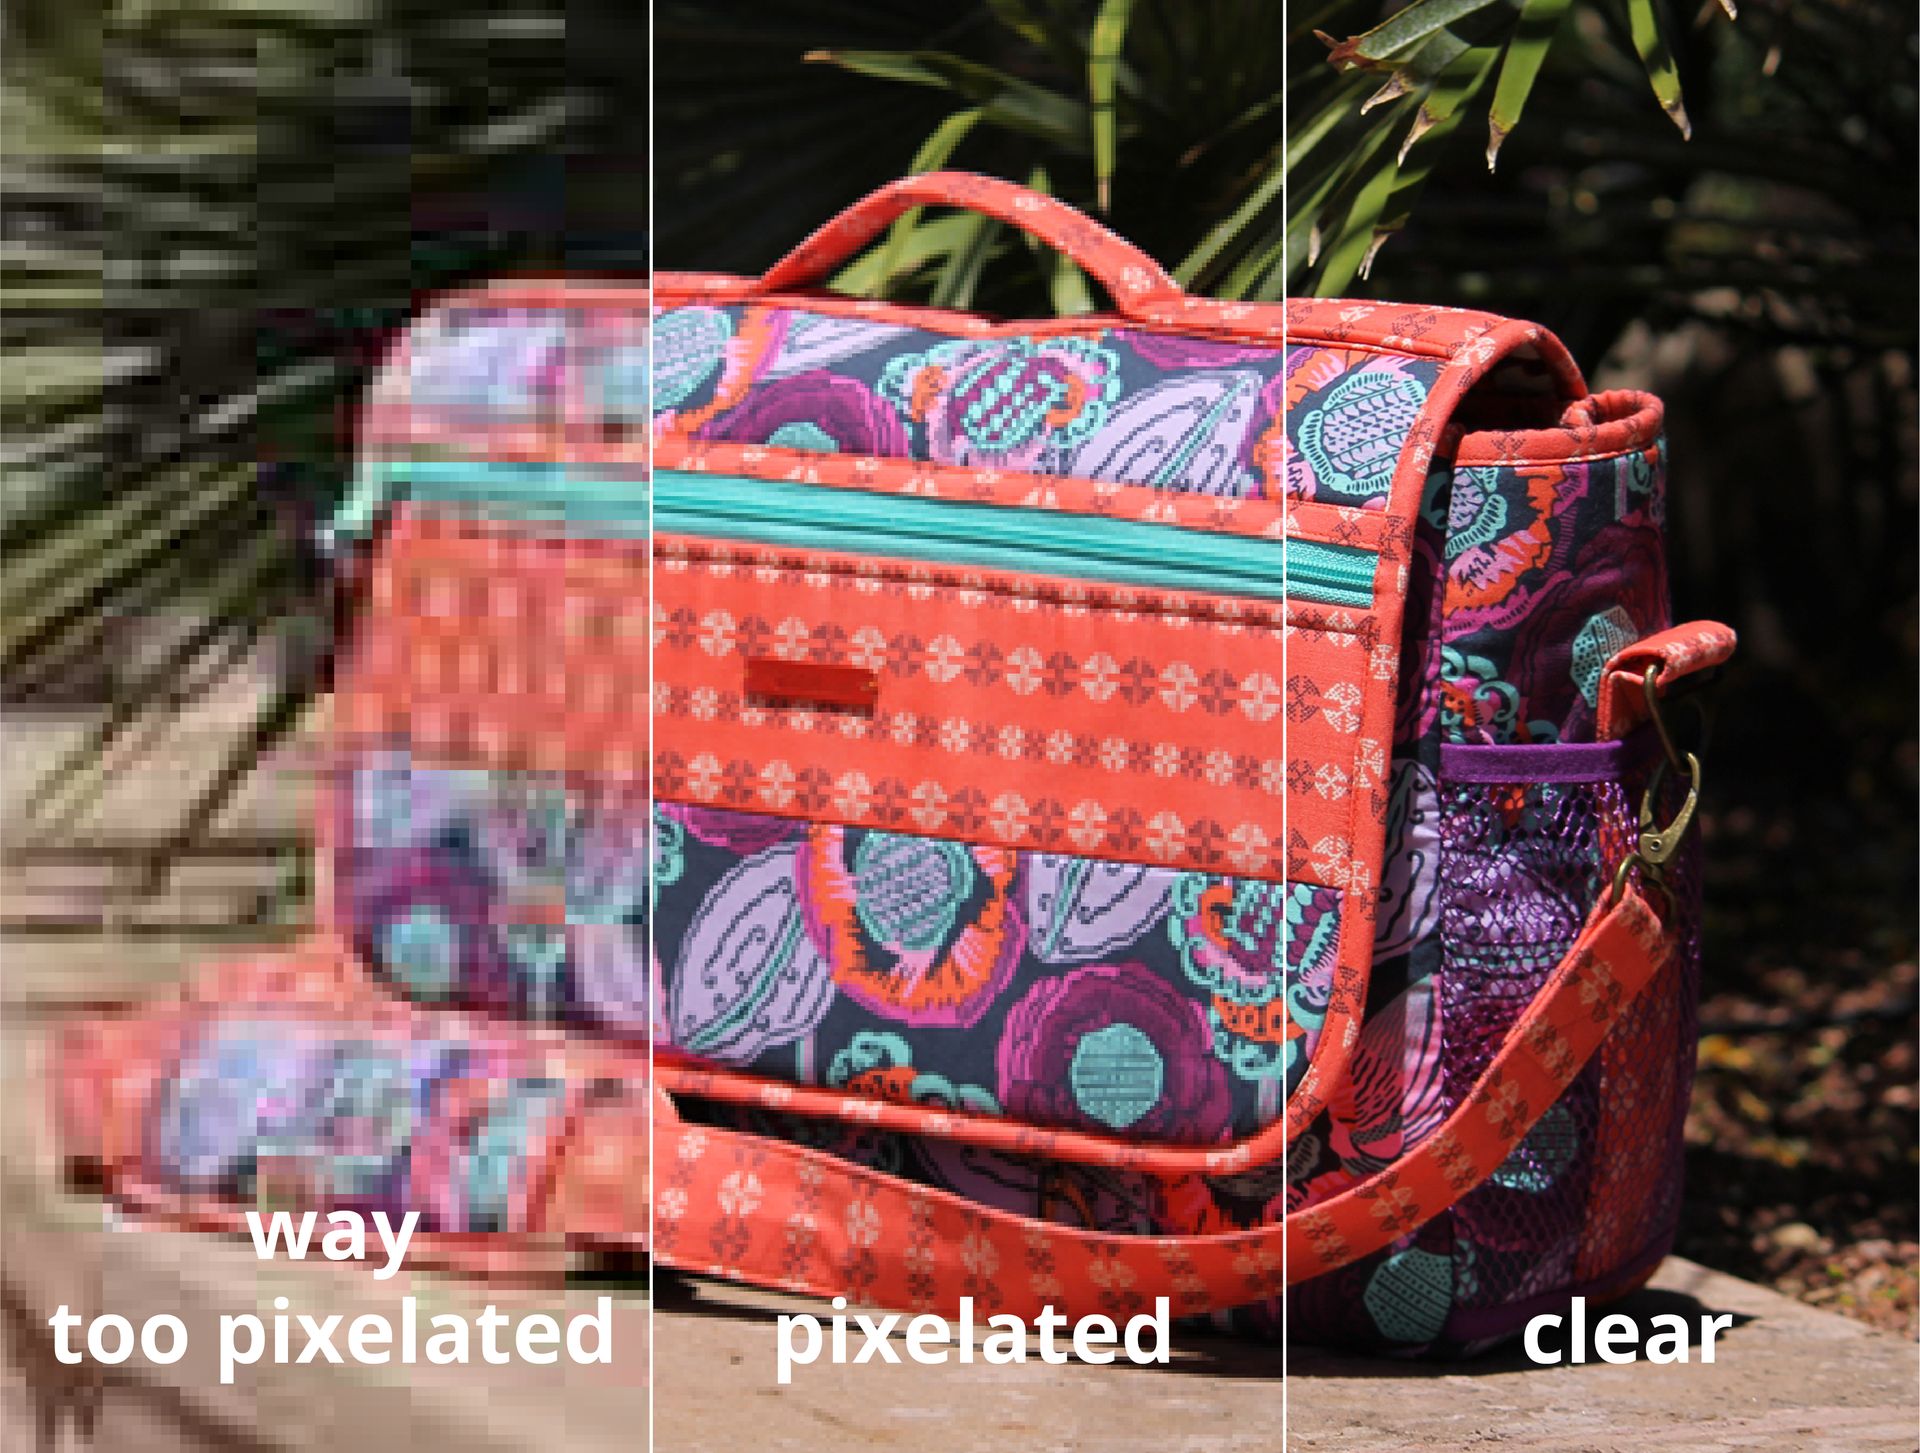
Poor image quality occurs when the image file is very small and as a result appears pixelated when viewed on a larger screen. Pixels are the tiny squares of color that ‘paint’ the image that you see on the screen of your phone, tablet, or computer. To make it simple, the more pixels you have in an image the larger your image will be and will therefore have a higher image quality. And why is image quality important? If an image is pixelated, it’s really hard to admire the beauty of your work and all the many hours you put into it. Keep in mind, you can always decrease the image if the file is too large, but you can’t increase the image size without damaging the quality of a picture.
Another way to ensure you get good results when taking pictures, is to take the time to make sure your camera is in focus. Always find the appropriate distance to your project so you don’t need to zoom in. If you decide to get a close up shot of your project in order to capture a smaller detail, allow your camera to adjust so you get the best clarity.
Tip: If you’re planning on submitting images for the ByAnnie Monthly Photo Contest, it’s always best to leave them as original, individual pictures instead of putting them into a collage. This will keep the picture at a higher quality.

Tell A Story
 They say a picture is worth a thousand words, so be creative with your story. Have fun experimenting with the setting of your picture.
Here are some fun ideas to help you get inspired:
- Snap a shot of your project in your sewing studio to show how and where it was made. Play around with props, such as placing the pattern or tools you used nearby.
- Take a photo of your new travel bag as you’re waiting for a plane in the airport.
- Use a backdrop such as a child’s nursery, neatly organized closet or bedroom to show off how your project will be used.
There are a million and one ways to tell a story with an image, so don’t be afraid to get a little creative with it.
___________________________________________________________________________________________
Spotlight Your Creativity
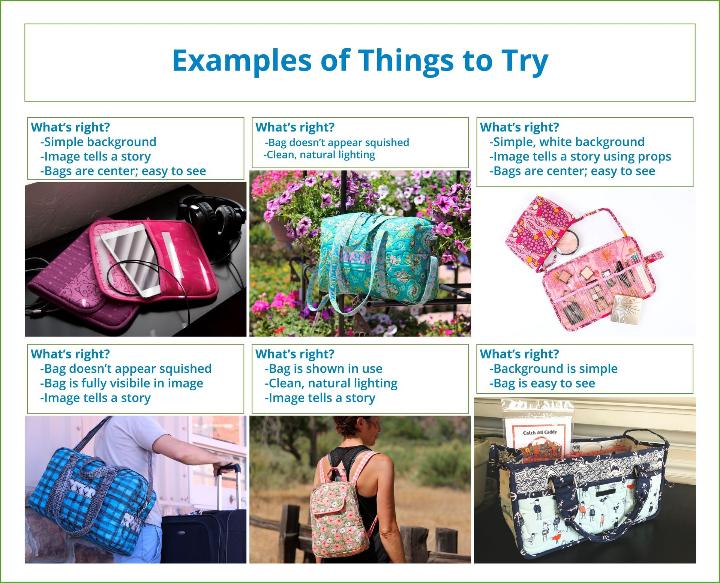
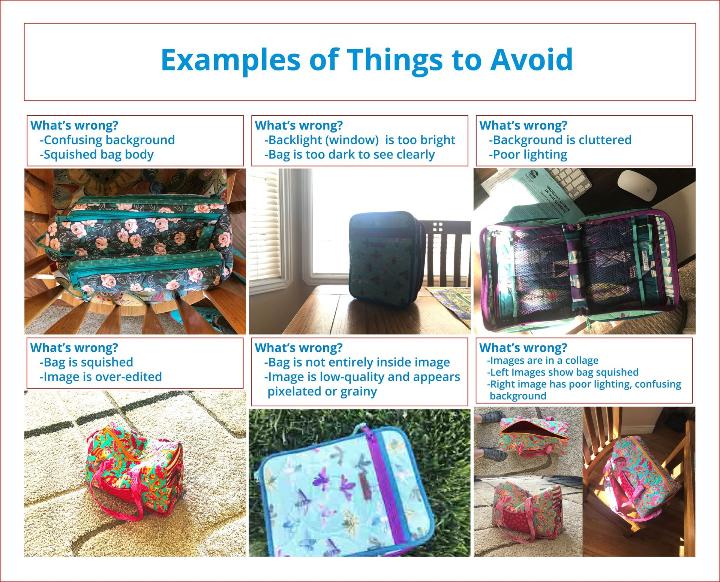
Keep in mind, it’s okay to let your project speak for itself. When in doubt, photograph  your project on a plain or white background and avoid clutter. Make sure your project is front and center, easy to see, and is completely visible within the frame of the image.
Try taking multiple pictures to show different angles or views of what you’ve made. This can be a great way to highlight the skill it took for you to create certain aspects, such as straps or binding.
Don’t forget that your creativity is part of the project too. Share your “process” with before and after photos. Take pictures of the fun mesh pockets or the cool zipper colors you picked. Show us the details, like how you fussy cut your fabric, or the artful placement of a beautiful focus fabric!
___________________________________________________________________________________________
Examples
Need a few ideas about what makes an image better or worse? Look below at these examples of images we like to see and images that could use a little work.


Let Us Know What You Think!
A fantastic way to connect with the sewing community is by sharing pictures and stories with one another. By showing off what we've created or learned, we can help inspire others. Let us know your tips for taking great pictures or tell us about your favorite Facebook or Instagram page showing lots of nice sewing photos! And don't forget to submit your images to the ByAnnie Monthly Photo Contest for a chance to win! Each month a grand prize winner will win a $50 coupon and 5 monthly runners up will win $10 coupons to be used on ByAnnie.com! For more details, read our rules and submission guidelines by clicking HERE.
HOW TO PHOTOGRAPH YOUR PROJECT